FEATURED ARTICLE
How To Use Emma - Your Guide to Getting Started

Rebekah May
August 18, 2020 •8 min read
TABLE OF CONTENTS
1: Add Multiple Accounts
2: Set Budgets
3: Start your Emma Pro trial
4: Discover Emma’s powerful tools
5: Start Rent Reporting
6: Start Earning Cashback
7: Create Savings Pots
8: Start Investing with Emma
9: Make a Payment
10: Refer a Friend
Summary
There’s a whole bunch of free and juicy features waiting for you when you first download Emma.
To make sure you’re getting the most out of our app, we’ve decided to write this handy guide to navigating all the Emma Finance features when you are getting started!
1: Add Multiple Accounts
Hoorah, you’ve officially downloaded Emma and have connected one of your accounts.
The next thing you’re going to want to do is connect all of your accounts. Connecting all your accounts to Emma means you'll have complete visibility of your finances.
The Accounts tab is split into different sections - Everyday, Savings, Investments & if you’re in the US/CA you’ll also have a Loans section.
To add an account, click the button that says “Add Account”.

You’ll now be shown a list of banks we currently support. The process is straightforward from here, you just need to select your bank of choice. If you can't see your bank on the main screen, try searching for it using the search bar.
Next, you’ll be directed to a consent screen. This makes sure that you’re aware of the data we’re going to access. We don't share this data with any third party providers, apart from those that make the actual connection such as Plaid (Canada and US only).
You will then be asked a couple of questions to finish connecting your bank account to Emma, but it shouldn’t be long before your details are visible in our app.
If you can’t see your bank on the list, you can suggest an integration by posting on the Emma Community.

2: Set Budgets
Now that your Emma account is linked to a financial institution, creating budgets is extremely simple.
First, if you scroll down your Feed tab, you’ll see a message that says "Set up budgets", tap this to start creating your budget and budgeting period.
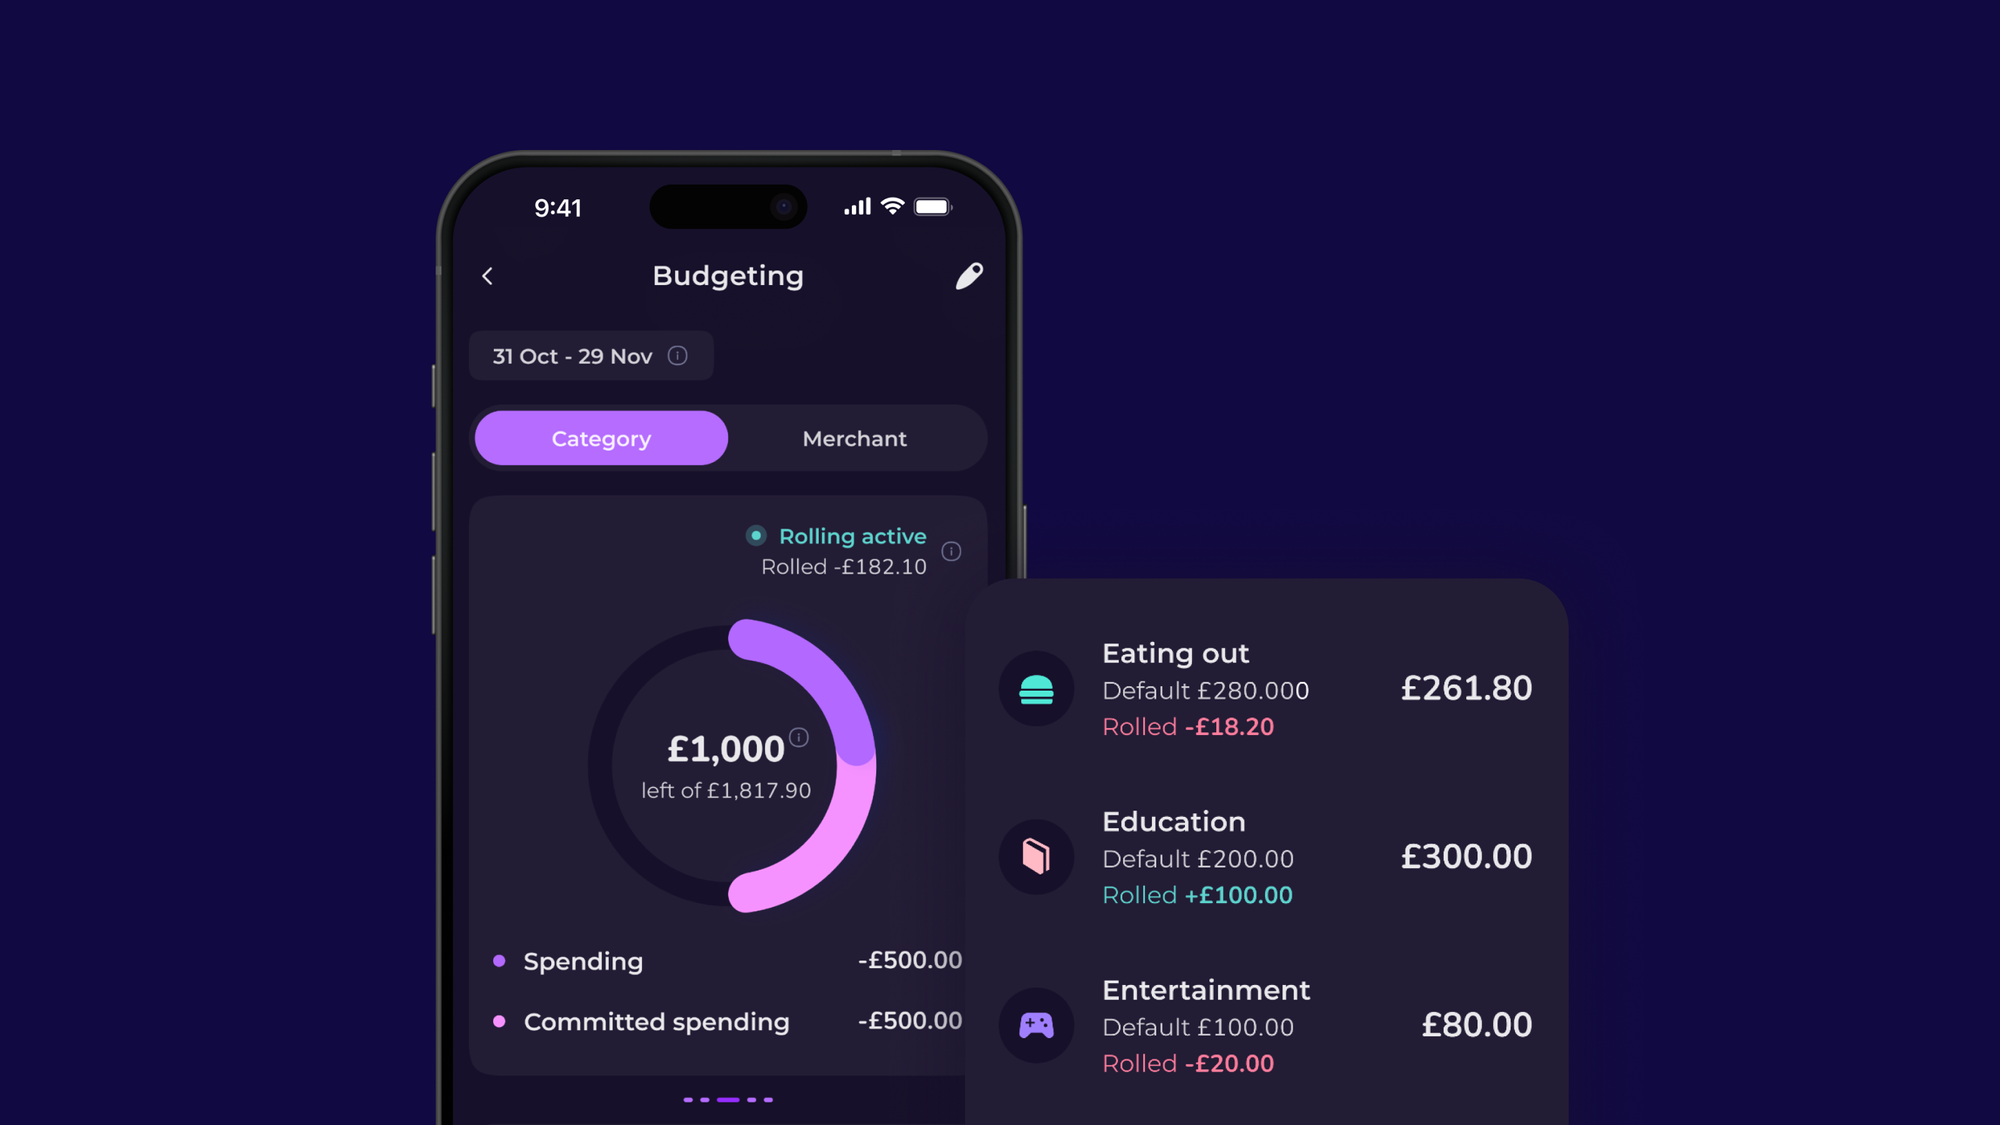
For most people, your budgeting period might be from the first of the month or the last working day of the month. For those who want their budget to rest more frequently you can set it to do so each week, biweekly, every 4 weeks or twice a month. The app also permits you to select a fixed or variable monthly date when your budget will reset. You can even set up a budget that rolls over monthly! You can find out the difference between these budgets on our FAQ page here. Choose whichever you think works best for you!

There are two ways you can now set budgets in Emma. The first is by setting a total budget, i.e. this month I can spend £1,000. Or, if you want more detail, you can set individual budgets by category. For example, you could allow £100 a month for groceries, £150 for bills, and so on.

Your total budget and the combined total of your category budgets do not have to be equal. If you want your total budget to be equal to the combined total of your category budgets, copy the Combined Budget Total you find at the top of the edit budget screen and enter it as your total budget.
If you’ve set budgets by category, you’ll now be able to track your spending vs your budget each month. You’ll notice as you spend more money in each category, the category box fills up with colour. You can use this as a visual guide to make sure you don’t go over your budget.
We’ll also help you to stick to your budget by sending you helpful notifications.
See also: How To Budget Using The Emma App
3: Start your Emma Pro trial
Make the most of what Emma has to offer with a free 7-day trial of our paid subscriptions. Give our Plus, Pro or Ultimate plans a try to find which suits your financial needs best. Gain access to tons of amazing features like on-demand syncs, unlimited bank logins, higher savings interest rates, lower fees when investing the ability to create custom budgeting categories and so much more!
To find out about the features of our subscriptions plans click here.
4: Discover Emma’s powerful tools
- Analytics
See exactly where your money goes with Emma’s real-time analytics features that allow you to track your spending across different categories, merchants, and time frames. Find the visuals that work best for you whether you want to view this data as a pie chart, as income vs spending, or spend over time.
- Recurring Payments
Emma is able to detect recurring payments and subscriptions you might have, from direct debits to standing orders to normal purchases. You can easily access Recurring payments directly from your Feed and view recurring payments both active and inactive. Plan ahead and stay on top of your payments by clearly seeing what amount is due and on what day.
- Custom Categories & tags
Ensure all of your transactions are properly aggregated to their corresponding category by editing transactions and tags to stay organized. Did a bit of home goods shopping at M&S and it got categorized as groceries? With Emma you can easily recategorise the transaction to ensure your budget stays on track.
- Search
The search function allows you to easily find a specific transaction or set of transactions depending on what you are looking for! With filters built in to help you navigate your transactions by merchant, date, amount, budget category, financial account or custom tags you can easily find individual transaction without having to scroll through extensive bank reports.
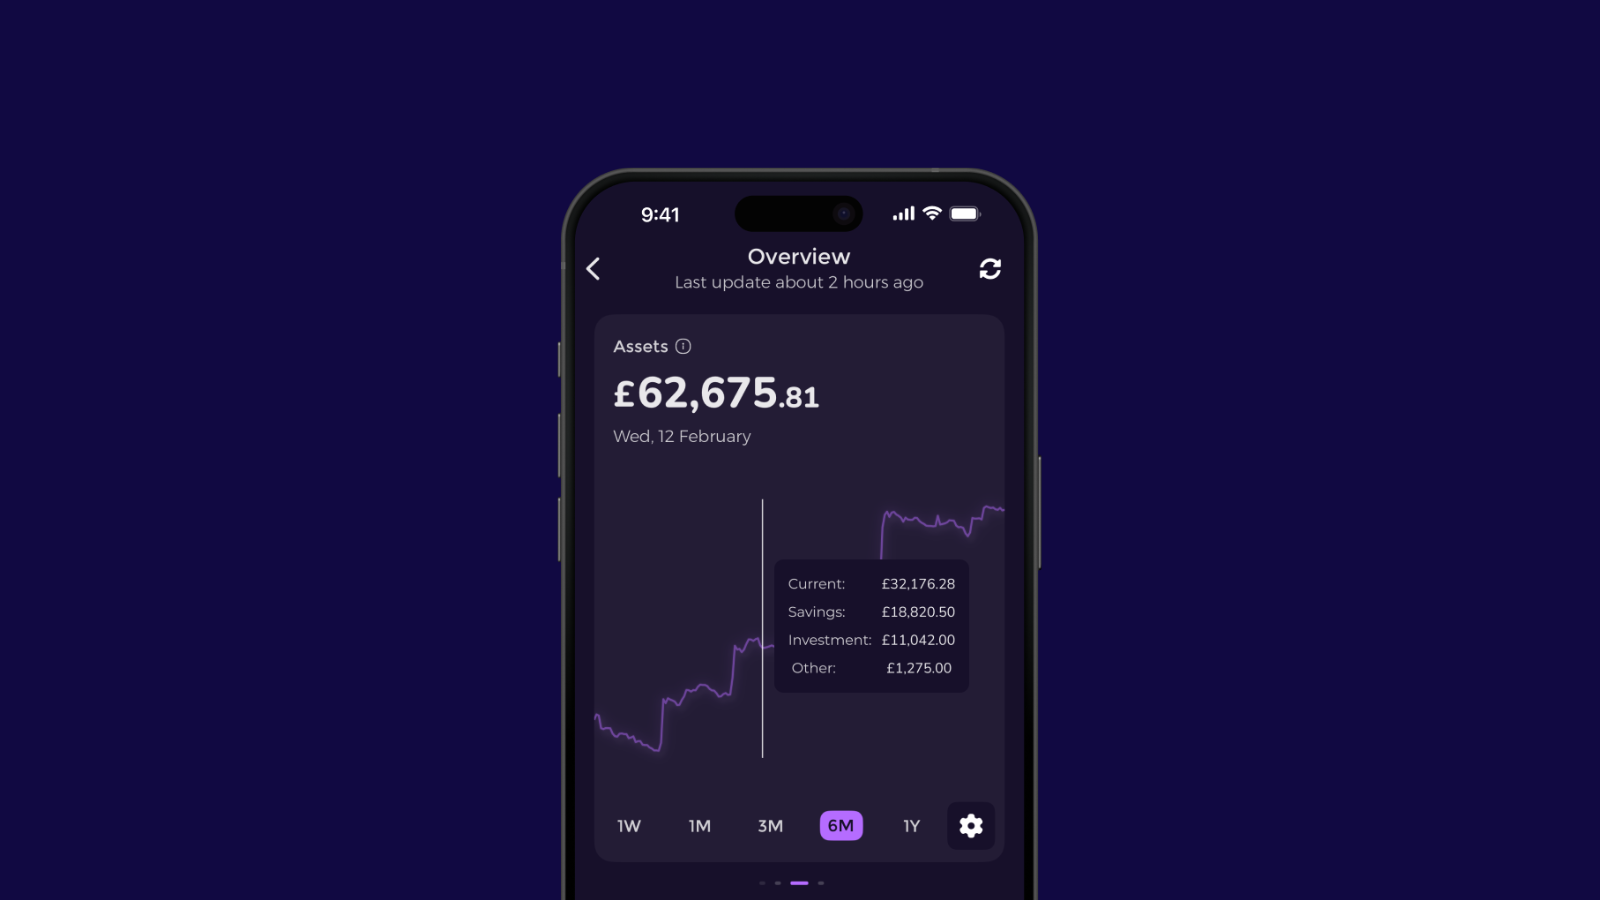
- Networth
Monitor your net worth by connecting your accounts to Emma and adding in any unlisted assets, savings or loans like your home or car. From here Emma tracks and updates your net worth so you can have a full overview of your financial health. It is important to track your net worth to make informed financial decisions, set & achieve financial goals and to heave a better understanding of your financial health.
- Spaces
Emma Spaces feature allows you to group your accounts together to help you organise your financial life in a way that works best for your unique needs. With Emma Spaces you can create different budgets and see analytics for different accounts connected in Emma as opposed to the standard format where they are shown together. With Spaces you can create a separate budget and category budgets for each Space you create. Spaces is perfect for those users who have a joint account with a partner, To keep track of your family's spending or your business accounts.
7. Add Offline Accounts
With Emma Pro you have the ability to add offline accounts like International or unsupported bank logins so you can have a full overview of your finances.
5: Start Rent Reporting
One of our favourite new features in the app is rent reporting which allows you to improve your credit position by simply reporting your rent payments. For many people their rent is their largest expense and rent reporting allows you to make the most of this payment to count towards your credit score! Simply turn on rent reporting in the app directly from your feed and select your rent payment from your transactions and Emma will start reporting your rent payment to major credit bureaus Equifax, Experian and Transunion! It is that simple!

6: Start Earning Cashback
Emma offers hundreds of amazing cashback and exclusive savings offers in the app! With tons of amazing brands you know and love, Emma can help you make a little extra money when you shop through the app! Whether that be 5% cash back at Boots, 4% at Nike, or 2% at Apple. Simply head over to the save tab and click cashback at the top of the page to get started!

7: Create Savings Pots
Now that you have your bank accounts connected to Emma, now is the time to make the most of Emma’s savings pots! With pots, you can create and customize as many savings pots as you want!
You can easily open a new pot for each of your specific savings goals and set a target amount for each! With Emma’s savings pots you can earn 3.51% AER and feel safe knowing your money is FSCS protected up to £85,000.
Easily transfer money from your connected accounts directly into your savings pots and start earning interest daily! For specific goals like saving for a house deposit or a vacation, you can set a goal and a date you want to have that amount by and Emma will keep you updated on your progress to ensure you hit your goals!

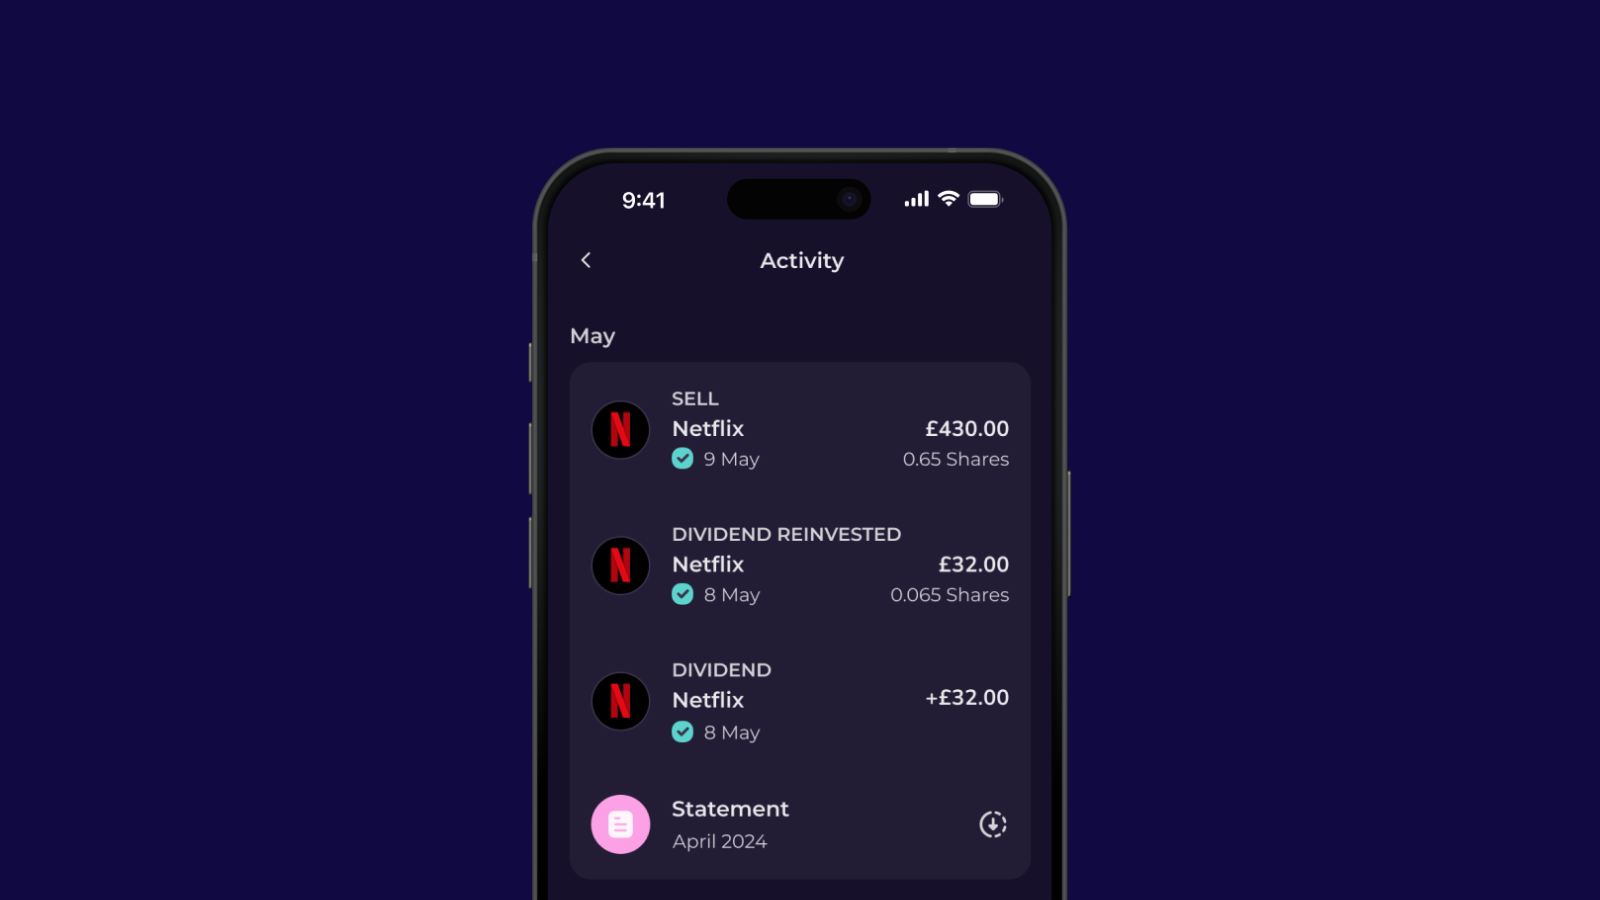
8: Start Investing with Emma
Emma Invest offers more than 2000 US stocks to invest in! You can easily get started investing with as little as £1. Whether you want to make a one-off purchase or set a recurring order you can find the investments that work for you and start to grow your portfolio directly in the Emma app! Remember, when investing, your capital is at risk.

9: Make a Payment
With Emma it is easy to pay anyone instantly. Easily Send and request money by sending payment links or flashing QR codes. Forget about sort codes and account numbers with Emma and pay back your friends with a tap. With the payments tab you can move money across multiple banks, split a purchase or topup your investment account in seconds. Send a friendly reminder to friends and family when they owe you money. With Emma you can even create groups and keep track of shared spending and balances to easily settle up after a trip, dinner out or rent amongst flatmates!

10: Refer a Friend
By now you’re probably thinking, “yep this app is really good, I’d love to show it to my friends”?
With scramble mode, your data will be shuffled and the currency will be changed to ¥. This means you can take your pals through the app, without worrying they’ll be checking out how much you earn, save, or spend!
As a bonus for every successful referral to friends and family who sign up to Emma via your referral, we will give you £15!

Summary
Remember at the start of the article we said there were a whole bunch of juicy features waiting for you in Emma? Well, we hope they’re all a little clearer now!
If you have any questions about any of these features, then head to the in-app live chat!
And as always, if you thought this article was useful then let us know on Facebook, Instagram, Twitter, or on the Emma Community!
Emma is a money management app that connects all your bank accounts to track your monthly spending and subscriptions. Emma will help you visualise and take control of your finances. Make sure you aren’t overspending, and show you practical steps to start budgeting effectively.
You may also like
Check out these related blog posts for more tips


Join 2 million happy customers
We are on a misssion to improve everyone's financial wellbeing.


© 2025 Emma Technologies Ltd. All Rights Reserved.
Emma is registered and incorporated in England and Wales.
Emma Technologies Ltd is an appointed representative of RiskSave Technologies Ltd, which is authorised and regulated by the Financial Conduct Authority (FRN 775330).
Payment services (Non MIFID or Deposit related products) for Emma Technologies Ltd are provided by The Currency Cloud Limited. Registered in England No. 06323311. Registered Office: Stewardship Building 1st Floor, 12 Steward Street London E1 6FQ. The Currency Cloud Limited is authorised by the Financial Conduct Authority under the Electronic Money Regulations 2011 for the issuing of electronic money (FRN: 900199). For more detail on how your money is protected please see here. You can also find Currency Cloud's Terms of Use here.
Emma Technologies is an Introducer Appointed Representative of Quint Group Limited and not a lender. Quint Group Limited is authorised and regulated by the Financial Conduct Authority (Firm Reference Number 669450). Monevo Limited is an Appointed Representative of TransUnion International UK Limited. TransUnion is authorised and regulated by the Financial Conduct Authority (Firm Reference Number 737740). Emma Technologies introduces customers first to Quint Group Limited, as a licensed credit broker, who then refers on to Monevo Limited.
Emma is registered with the Financial Conduct Authority under the Payment Services Regulations 2017 for the provision of payment services.
Financial Conduct Authority Reg Nr: 794952.
Company Registration Number: 10578464.
Data Protection Registration Number: ZA241546.
All testimonials, reviews, opinions or case studies presented on our website may not be indicative of all customers. Results may vary and customers agree to proceed at their own risk.
Resources: Cancel subscriptions, Cashback offers, Who charged me, Rent Reporting, Budgeting, Investment universe, Emma vs Moneyhub.
Featured cashback offers: Samsung, SimplyCook, NordVPN, Audible, M&S Homeware.